
Displaying products dynamically within your website (your-username.htm template)
Overview
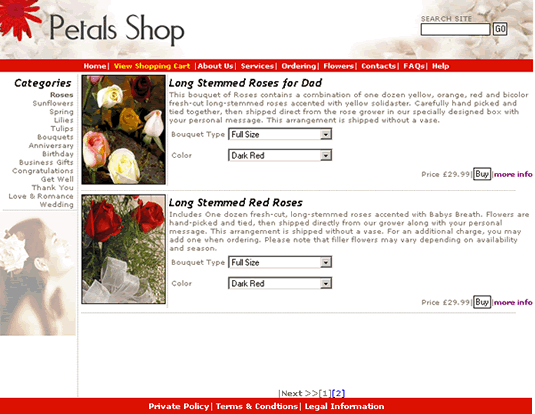
This page is is used to display products "dynamically" within your site and is a very powerful method of displaying products with the relevant "buy buttons" automatically added alongside the product. The template can be used to display any number of products, which have been organised into their own categories. For example have a look at the petals shop. Clicking on one of the Categories in the left menu will display products of that particular category.
This system has numerous advantages;
- Adds buy buttons automatically to each product so is quick to implement for the larger store with greater number of products
- Product catalog can be kept upto date by adding or deleting products in a simple form(Product Manager/ Category Manager). Products will display according on the actual website.
- Fits seamlessly into your own website's design layout
- Once setup by the web designer non-technical staff can keep the system updated.
- Organises products into their own categories. Category links can be placed anywhere on your site
Customisation Process
BazaarBuilder provides a method to add an ecommerce facility seamlessly into any web site's own design. Typically speaking you will have already decided the overall scheme of the website. For instance you may have decided that the category links are to run in a left menu and that products are to display like that on the our petals demo shop.
Adding Product Categories
To obtain the html link code for any of the product Categories;
- Click on View Pages link in Customise Template section of left menu. ( BUILD SHOP)
- You will see a list of link for each of categories that you entered. Click on category for which link code is required
- Copy and Paste the link code that appears in the address bar of your browser to any location on your website.
- Repeat for all product categories.
Customising the yourusername.htm template
The actual customization procedure is same as with all other similar pages;
Step 1: Getting unformatted copy From BazaarBuilder
Download the "default" copy of your-username.htm from BazaarBuilder to start the customization process. The default your-username.htm contains no formatting as it must be me customized according to each your website's design. To get the template via e-mail;
- Select "Download Templates". Choose the default templates (unformatted) or one's you may have uploaded. Select your-username.htm
- Enter your amyl address where the default templates are to be sent. NOTE: On occasion some e-mail clients such as Outlook do not receive the e-mail attachments correctly. It is advised that you try using an alternative e-mail address from hotmail , yahoo or any other web based e-mail system.
- Press Download.
Step 2: Modifying The Templates.
After receiving the template via e-mail, open it in your favorite web design
tool such as Dreamweaver and customize it till you are satisfied with its layout.
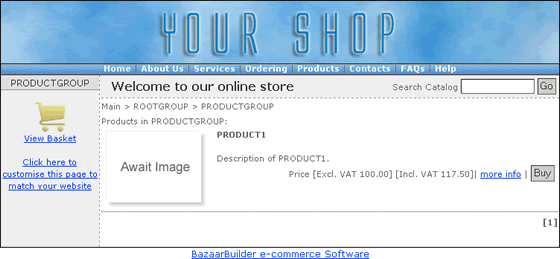
Default Design of username.htm template before your customisation

You may already have a page built that acts as a template for this site's design.
In this case simply "cut +paste" the downloaded page into your site
and save it as your-username.htm. This template can be uploaded as in step 3
and the process repeated further till you are satisfied with the design.
The default template contains special variables which look almost exactly like normal HTML tags. Each of these variables represents a data for the concerned products that was inserted in the Category Manager section. As long as these variables are included in your pages in their given sequence, you have complete control on how each of the pages is customized to match the rest of the website.
Typical look after customisation to match your site

Note 1: Take special care with setting the directory paths to various images and style sheets that may be used on the page. By default ALL the images will be stored in following directory: /username/images/ (where username is YOUR own username that was registered with BazaarBuilder). Only GIF and JPG images are allowed. So if an image named globe.gif is used on the pages then the path would be /username/images/globe.gif. Some design tools such as dreamweaver automatically the directory paths so its always worthwhile to double check these before uploading the page.
Read this article about how to customise this template by an alternative method which provides the raw html code for individual components that form this page ( category links, products search box, product display form and viewcart). This method provides finer control over the design process and is preferred by users with knowledge of basic HTML syntax.
Step 3: Uploading the modified Templates
After modification files are uploaded again to the server by following these simple steps;
- Select "Upload Templates". A list of templates is displayed. Select all the required templates and press "Upload".
- The online store will now work. Repeat Step 2 until you are satisfied with the result. Images and Style Sheets (css) can be upload in same manner by following steps 3 and 4 below
- Step 4: Uploading Template Images
All images included in the template design are can be uploaded. All images will be placed in directory /username/images/ on the web server.
- Select "Upload Images". Select upto three images at a time to upload and press "Upload".
- Additional images can be uploaded by repeating the process as many times as required.
Step 5: Uploading Template Style Sheets
In case you have used any external style sheets (css) which need to reside on the server, they can be uploaded to the server by following these simple steps
- Select "Upload CSS". Select the style sheet and press "Upload".
- paths to the style sheets are /username/
Adding a ViewCart / Checkout link
Note: In case you don't want to display VAT inclusive prices on your product pages, simply html comment out VAT Price variable by adding around the price i.e. . DO NOT DELETE the this or any other spevial variable. Presence of all special variables in the page is mandatory but may be commented out in case they are not required to be displayed on the website.
This page contains following 45 Variables:
- <tmpl_if name="bool">
- <tmpl_loop name=cart>
- <tmpl_if name="image">
- <tmpl_var prodname>
- <tmpl_var groupname>
- <tmpl_var prodid>
- <tmpl_var tot2>
- <tmpl_var customer>
- <tmpl_var id>
- <tmpl_var cs>
- <tmpl_var prodid>
- <tmpl_var customer>
- <tmpl_var prodname>
- <tmpl_var products>
- <tmpl_var prodid>
- <tmpl_var customer>
- <tmpl_var image>
- <tmpl_var unitprice>
- <tmpl_var vatprice>
- <tmpl_var product_desc>
- </tmpl_if>
- </tmpl_loop>
- <tmpl_if name="flag">
- <tmpl_var catparid>
- <tmpl_var bool>
- <tmpl_var count>
- <tmpl_var pname>
- <tmpl_var customer>
- <tmpl_var id>
- </tmpl_if>
- <tmpl_else>
- <tmpl_loop name=cart>
- <tmpl_var groupname>
- <tmpl_var prodid>
- <tmpl_var customer>
- <tmpl_var id>
- <tmpl_var prodname>
- <tmpl_var image>
- <tmpl_var prodid>
- <tmpl_var customer>
- <tmpl_var id>
- <tmpl_var prodname>
- <tmpl_var prodname>
- </tmpl_loop>
- </tmpl_if>
Note: In case you don't want to display Inc. VAT prices on your product pages, you simply need to comment VAT Price variable. i.e. <!-- <TMPL_VAR vatprice -->. If you will remove the variable, whole thing will stop working. Presence of all above variables in the page is mandatory.
Read this article about how to customise this template.
